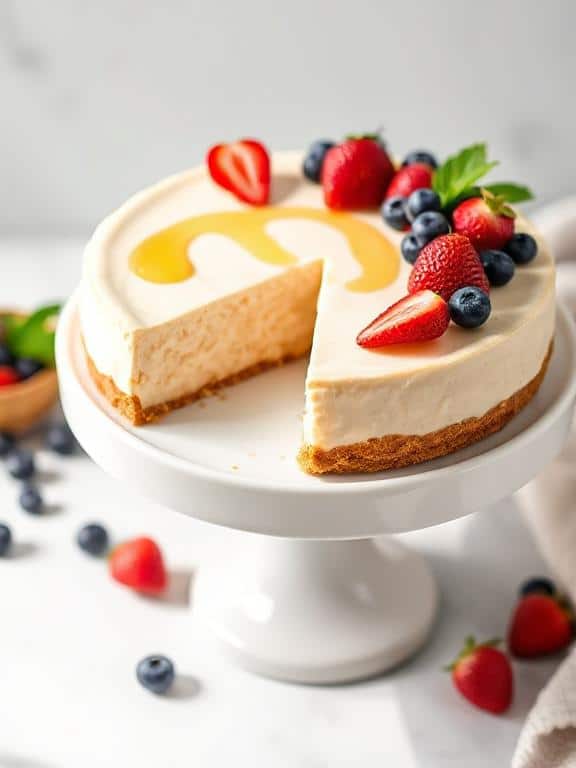
When I think about desserts that never fail to impress, a creamy no-bake cheesecake recipe is always at the top of my list. There’s something magical about that silky, rich filling paired with a buttery, slightly crunchy crust. The best part? You don’t even have to turn on your oven. This makes it a perfect dessert for warm days, busy schedules, or those moments when you want to serve something spectacular without spending hours in the kitchen.
Over the years, I’ve perfected my approach to no-bake cheesecakes. I’ve learned the little tweaks that make all the difference in texture, flavor, and presentation. Whether you’re making it for a family celebration, a holiday dinner, or just a sweet weekend treat, this recipe will help you create a dessert that’s smooth, flavorful, and absolutely irresistible.
If you’ve ever been intimidated by the idea of making cheesecake, don’t be. The beauty of a no-bake version is that it’s much more forgiving than its baked counterpart. There’s no risk of overbaking, no worrying about cracks, and no water bath to fuss over. Just follow my steps, and you’ll have a flawless cheesecake every single time.

Why You’ll Love This Creamy No-Bake Cheesecake
One of the main reasons I love this creamy no-bake cheesecake recipe is its versatility. You can serve it plain for an elegant, minimalist look, or you can dress it up with fresh fruit, chocolate drizzles, caramel swirls, or even crushed candy bars. It’s like having a blank canvas that you can customize to match the occasion or your mood.
Another reason this recipe is a keeper is its texture. A truly good no-bake cheesecake should be light yet indulgent, creamy without being overly heavy, and firm enough to slice without collapsing on your plate. The combination of smooth cream cheese, a hint of sweetness, and a touch of tang creates a balanced flavor that keeps you coming back for another bite.
Finally, this recipe is stress-free. I’ve had moments when last-minute guests were coming over, and I could whip up this dessert in under 30 minutes (plus chilling time) without breaking a sweat. That’s a lifesaver when you want something impressive but don’t have the luxury of spending hours baking and cooling a traditional cheesecake.
What is a No-Bake Cheesecake?
If you’ve only ever had baked cheesecake, the idea of skipping the oven might sound odd at first. A no-bake cheesecake is exactly what it sounds like — a cheesecake that sets in the refrigerator rather than in the oven. Instead of using eggs and heat to firm up the filling, this dessert relies on chilling to achieve its structure.
The base is typically made from crushed cookies or graham crackers mixed with melted butter to form a crust. The filling usually combines cream cheese, sugar, and whipped cream or whipped topping, which helps give it a light, airy texture. Sometimes, I like to add a little lemon juice or vanilla extract for an extra layer of flavor.
One of the biggest advantages of a no-bake cheesecake is that it’s far less fussy than the baked version. There’s no risk of overcooking, no cracks to worry about, and no waiting for the cheesecake to cool before you can refrigerate it. You simply prepare the crust, whip up the filling, pour it in, and let the fridge do the rest.
For me, a creamy no-bake cheesecake recipe is the ultimate combination of convenience and indulgence. It’s perfect for both beginners who want to try their hand at making cheesecake for the first time and seasoned cooks who want a reliable, quick dessert option.
Ingredients You’ll Need
The ingredients for a creamy no-bake cheesecake are simple, but the quality of each component makes a huge difference in the final result. Here’s what you’ll typically need, along with some tips from my own kitchen experience.
Crust
-
Graham crackers or digestive biscuits – These form the base of your crust. I recommend crushing them into fine crumbs for the smoothest texture.
-
Unsalted butter – Melted butter binds the crumbs together. I prefer unsalted so I can control the flavor.
Filling
-
Cream cheese – This is the star of the show, so use a good-quality, full-fat cream cheese for the creamiest result.
-
Powdered sugar – It blends more smoothly into the filling than granulated sugar.
-
Heavy cream or whipping cream – This helps to lighten the texture and create that luscious mouthfeel.
-
Vanilla extract – Adds warmth and depth to the flavor.
-
Fresh lemon juice – A little acidity brightens the richness of the cheesecake.
Optional Toppings
-
Fresh berries, chocolate shavings, fruit compote, caramel sauce, or even edible flowers for a special touch.
Here’s a quick reference table for the classic version:
| Ingredient | Amount | Notes |
|---|---|---|
| Graham cracker crumbs | 1 ½ cups | Fine texture for a firm crust |
| Unsalted butter | 6 tbsp, melted | Adjust if crust feels too dry |
| Cream cheese | 24 oz | Full-fat for best texture |
| Powdered sugar | 1 cup | Sifted for smooth blending |
| Heavy cream | 1 cup | Chilled before whipping |
| Vanilla extract | 2 tsp | Pure extract preferred |
| Lemon juice | 2 tbsp | Freshly squeezed |
When you start with high-quality ingredients, you’re already halfway to making a cheesecake that tastes like it came from a professional bakery. In the next part, I’ll walk you through how to choose the best cream cheese and the techniques I use to ensure a perfectly creamy, no-bake cheesecake every single time.
Choosing the Best Cream Cheese for the Recipe
Over the years, I’ve tested every type of cream cheese I could get my hands on, and I can tell you this — the brand and style you choose will make or break your creamy no-bake cheesecake recipe. The key is to use full-fat, block-style cream cheese. Avoid the whipped or spreadable varieties that come in tubs; they often contain extra air or stabilizers that can alter the texture of your filling.
A block of cream cheese has a denser consistency, which means your cheesecake will set properly in the refrigerator and have that signature velvety smoothness. I also recommend letting it soften at room temperature before using it. This makes it much easier to beat into a lump-free filling.
If you can, go for a well-known, high-quality brand. I’ve found that cheaper brands can sometimes have a slightly grainy or watery texture. While they might work in a pinch, they won’t give you the same rich, luxurious mouthfeel as a premium option. Think of the cream cheese as the heart of your cheesecake — it deserves special attention.
For an extra flavor boost, I sometimes blend cream cheese with a little mascarpone. It adds a delicate sweetness and a subtle creaminess that makes every bite taste like a special occasion.
The Secret to a Perfectly Creamy Texture
Getting that dreamy, melt-in-your-mouth texture isn’t just about the ingredients — it’s about how you handle them. I’ve learned that the order in which you combine your ingredients plays a big role. I always start by beating the cream cheese until it’s completely smooth. This ensures there are no lumps before I add anything else.
Next, I blend in the powdered sugar slowly, making sure it’s fully incorporated before moving on. This step is important because sugar helps break down the cream cheese even further, giving you that silky base.
When it comes to the heavy cream, I whip it separately until soft peaks form, then gently fold it into the cream cheese mixture. This folding technique helps maintain the airiness, which is what gives a no-bake cheesecake its light, mousse-like texture. If you stir too aggressively, you risk deflating the cream and ending up with a denser filling.
Temperature control is also key. Use chilled heavy cream for whipping, but make sure your cream cheese is softened. The contrast helps you whip air into the cream while keeping the cream cheese blendable. And once your cheesecake is assembled, let it chill for at least 6 hours — overnight is even better. The extra time allows the flavors to meld and the filling to set beautifully.
Step-by-Step Instructions
Making this creamy no-bake cheesecake recipe is easier than you might think, and I’ve refined my process so it’s as foolproof as possible. Here’s exactly how I do it:
Step 1: Prepare the Crust
Crush your graham crackers into fine crumbs. You can do this with a food processor or by sealing them in a zip-top bag and rolling over them with a rolling pin. Combine the crumbs with melted butter until the mixture resembles wet sand. Press the mixture firmly into the bottom of your springform pan, using the back of a spoon to create an even, compact layer. Place the crust in the refrigerator while you make the filling.
Step 2: Whip the Cream
Pour chilled heavy cream into a mixing bowl and beat until soft peaks form. Set aside. The goal here is to get light, fluffy cream that will fold seamlessly into your filling.
Step 3: Make the Filling Base
In a separate large bowl, beat softened cream cheese until completely smooth. Gradually add the powdered sugar, mixing until well incorporated. Stir in the vanilla extract and lemon juice, blending until the mixture is uniform and creamy.
Step 4: Combine the Cream and Cream Cheese Mixture
Using a spatula, gently fold the whipped cream into the cream cheese mixture. Take your time with this step — you want to keep the filling light and airy.
Step 5: Assemble the Cheesecake
Remove the crust from the fridge and pour the filling over it. Spread the mixture evenly with a spatula, smoothing the top for a clean finish.
Step 6: Chill and Set
Cover the cheesecake with plastic wrap or foil and refrigerate for at least 6 hours, or preferably overnight. This will ensure the filling sets firmly and slices cleanly.
Step 7: Garnish and Serve
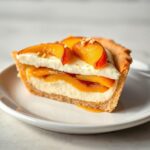
Once set, remove the cheesecake from the springform pan. Add your favorite toppings — fresh berries, a drizzle of chocolate, or a swirl of fruit compote — and serve chilled.
This process has never failed me, and it’s the same method I use for both everyday desserts and special-occasion cheesecakes. In the next part, I’ll share my professional tips, flavor variations, and solutions to common cheesecake problems so your results are flawless every time.
Pro Tips for the Best Results
Over the years, I’ve learned that small adjustments can make a huge difference in how your creamy no-bake cheesecake turns out. One of my top tips is to always chill your mixing bowl and whisk before whipping cream. It may seem like a small detail, but it helps the cream whip faster and hold its shape longer.
Another trick I swear by is pressing the crust firmly into the pan with the bottom of a measuring cup. This gives you a smooth, even base that stays intact when you slice the cheesecake. If the crust is too loose, it can crumble apart when serving.
Also, patience is your best friend here. While it’s tempting to slice into the cheesecake after just a few hours, the longer you let it set, the better the texture will be. I usually prepare mine the night before I plan to serve it, giving it plenty of time to firm up and develop flavor.
Common Mistakes and How to Avoid Them
A common mistake with no-bake cheesecakes is using low-fat or whipped cream cheese. These can cause your filling to be too soft and prevent it from setting properly. Always stick with full-fat block cream cheese for the most reliable results.
Another pitfall is overmixing after folding in the whipped cream. Stirring too much knocks out the air and makes the filling dense instead of light and fluffy. I recommend using a gentle folding motion until the cream is just combined.
Finally, avoid skipping the chilling time. If you rush this step, your cheesecake will be loose and won’t slice neatly. Give it the full time in the fridge — trust me, it’s worth the wait.
Variations and Flavor Ideas
One of my favorite things about a creamy no-bake cheesecake recipe is how easy it is to customize. You can infuse the filling with cocoa powder for a chocolate version, swirl in fruit puree for a fruity twist, or add a layer of caramel for a decadent treat.
For a tropical variation, try adding a little coconut extract and topping with toasted coconut flakes. Or, for a festive holiday touch, stir in a hint of peppermint extract and decorate with crushed candy canes.
The possibilities are endless, and once you have the base recipe down, you can experiment with flavors to match the season or your personal taste.
Topping Suggestions
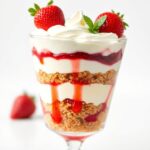
Toppings are the finishing touch that take your cheesecake from great to unforgettable. I often reach for fresh berries — strawberries, blueberries, raspberries — because their tartness balances the richness of the filling.
A drizzle of melted chocolate or caramel sauce adds indulgence, while a dusting of cocoa powder or powdered sugar gives a simple yet elegant finish. For special occasions, I like to arrange thin slices of citrus fruit or kiwi on top for a pop of color and freshness.
How to Make it Ahead of Time
This cheesecake is a dream when it comes to planning ahead. You can make it up to two days in advance and store it in the refrigerator until you’re ready to serve. Just keep it covered to prevent it from absorbing any fridge odors.
If you want to prepare it even earlier, you can freeze the cheesecake (without toppings) for up to a month. Simply thaw it overnight in the fridge before serving and add your garnishes just before bringing it to the table.
Storage and Shelf Life
Once made, this cheesecake will stay fresh in the refrigerator for about 4 to 5 days. Always store it in an airtight container or wrap it tightly to maintain its texture and flavor.
If you have leftovers, they also freeze beautifully. Slice the cheesecake into portions, wrap each piece individually, and store them in a freezer-safe container. This way, you can enjoy a piece of cheesecake whenever the craving strikes.
Serving Suggestions
While I love serving this cheesecake on its own, pairing it with the right drink can elevate the experience. A cup of freshly brewed coffee, a glass of sparkling wine, or even a light dessert wine like Moscato complements the creamy texture perfectly.
For a more indulgent dessert table, serve it alongside other no-bake treats like chocolate mousse cups or fruit parfaits. The combination of flavors and textures makes for an impressive spread.
Troubleshooting Guide
-
Filling is too soft – Check if you used full-fat cream cheese and gave it enough chilling time.
-
Crust falls apart – Make sure the crust is packed firmly and has enough melted butter to bind it.
-
Cheesecake tastes too sweet – Reduce the powdered sugar slightly and add a touch more lemon juice for balance.
-
Lumpy filling – Ensure cream cheese is fully softened before mixing to avoid lumps.
Healthier Ingredient Swaps
If you want to make a lighter version, you can swap heavy cream for coconut cream, use reduced-fat cream cheese (though the texture may be slightly softer), or replace part of the powdered sugar with a natural sweetener like stevia or monk fruit.
You can also make the crust with almond flour and coconut oil instead of graham crackers and butter for a gluten-free, lower-carb option.
Frequently Asked Questions
Can I use whipped topping instead of whipped cream?
Yes, but the flavor and texture may be slightly different. Freshly whipped cream gives the best results.
Do I have to use lemon juice?
It’s not mandatory, but I recommend it. The acidity helps balance the richness of the cream cheese.
How long should I chill the cheesecake?
At least 6 hours, but overnight is ideal for the best texture.
Final Thoughts & Encouragement
A creamy no-bake cheesecake recipe is one of those desserts that delivers maximum impact with minimal effort. With the right ingredients, a little patience, and a few professional tips, you can create a dessert that looks bakery-perfect and tastes even better.
I’ve made this cheesecake countless times for friends, family, and special occasions, and it never fails to get rave reviews. Once you master the base recipe, you’ll find endless ways to customize it to suit any event or season.
So, grab your cream cheese, whip up that filling, and let the fridge work its magic. You’re about to discover just how easy — and delicious — making your own no-bake cheesecake can be.
Ingredients
Method
- Combine graham cracker crumbs and melted butter. Press firmly into the bottom of a springform pan. Chill while making the filling.
- Whip chilled heavy cream until soft peaks form. Set aside.
- In another bowl, beat softened cream cheese until smooth. Add powdered sugar, vanilla, and lemon juice, mixing until creamy.
- Gently fold whipped cream into the cream cheese mixture until just combined.
- Spread the filling evenly over the crust. Smooth the top.
- Cover and chill for at least 6 hours or overnight.
- Add toppings before serving.